By Hongtao Hao, originally posted on his blog. You can find the GitHub Repo of this tutorial website at https://github.com/hongtaoh/hugo-tutorial.
A friend asked me whether I can help him create his own personal website. I have long been wanting to write a simple tutorial on this and now I think it’s time to do that.
In this age of informaiton, it’s important to have your online presence. It not only helps others to know you more quickly; it also helps you to express yourself to, and share your experiences and knowledge with, the outside world.
Note: All instructions below assume that you are using a Mac. If you are a Windows or Linux user, you can still read this post but I can’t guarantee the steps are exactly the same.
WordPress or Hugo
Before getting started, a key question you should have is which tool you want to use to build your website.
The most popular website building tool is definitely WordPress, which is said to contribute to 80% of the web today1. To make your decision on website building tools, I recommend reading these two articles comparing Wordpress and Hugo, one by Rebecca Markowitz, and the other by Regis. You can also read a comparison between the two from a WordPress developer’s perspctive.
The benefits of using Hugo are obvious: It’s super fast; you’ll have control over the whole website generating process; more freedom to create your own style (which means more time as well). Hugo is a static site generator. It’s my favorite but definitely not the only option. There are many static site generators out there.
If you choose to use Hugo over WordPress, be prepared to spend some, if not a lot of, time learning how to code2.
You can also check out themes by Hugo and WordPress to make a decision.
If you choose WordPress, you can stop here, as this tutorial will be about using Hugo. Sorry.
Try simple themes in the begining
In Hugo, you’ll need Markdown to write your posts. Whenever you forget how to use Markdown, please refer to this cheat sheet.
Hugo provides a lot of themes. As the popularity of Hugo increases, there are more and more themes coming up. My suggestion for beginners is don’t spend much time in the begining on choosing themes. Just get started with the simplest theme and as you become more familiar with Hugo, you can try complex ones or even create your own. This is for two reasons:
If you have little to no programming skills, it’s very difficult for you to customize complex themes. Even though there are many themes, chances are that you won’t be 100% satisfied with any of them, so you’ll want to make a lot of changes. The more complexity, the more difficulty to customize it. This leads to the second reason.
You’ll get tired of the theme you like now so you probably will change it again later.
For this tutorial, I’ll use this hugo-lithium-theme, created by Jonathan Rutheiser and later modified by Yihui Xie. I’ll use the modified version.
First meeting with Git and Hugo
Installing Hugo
Let’s get started. I’ll show you how I use this theme to build a simple website.
First of all, you need to install Hugo. To do that, please read my earlier post about Hugo installation.
If you don’t know how to open Terminal on your Mac: on the upper-right corner of the screen, you’ll see a search icon. Click it and then type Terminal, then press Enter key on your keyboard.
Cloning the theme
After opening your Terminal, first check whether you have correctly installed Hugo. All the following codes, if not specified otherwises, should run in your Terminal.
Input the following code and press Enter key:
hugo version
If it shows something like Hugo Static Site Generator v0.70.0-7F47B99E ..., then you should be fine.
Please remember your Hugo version. In the case above, the result shows that the version is 0.70.0. Your version might be different. Write it down now since we’ll need this version number later.
Then copy and past the following codes, and press the Enter key3:
hugo new site lithium # You can change lithium to any other name you like
You then should see the folder named lithium on your Desktop.
Then go to Terminal again, copy and past the following codes, and press the Enter key:
git clone https://github.com/yihui/hugo-lithium
You’ll see a folder named hugo-lithium on your Desktop. What you’ll need to do later seems to be a little complex, but I’ll explain in deatil:
Open the folder of lithium, under the directory of themes, create a new folder called hugo-lithium. Then, go to the hugo-lithium folder on your Desktop (not the one you just created under the themes folder). Drag all the contents in this hugo-lithium folder on your Desktop into the hugo-lithium folder you just created under the themes folder.
Go to the folder lithium on your Desktop, open themes -> hugo-lithium -> exampleSite, and then copy the three files/folders in exampleSite, namely config.toml, content, and static. Then go to the root of your lithium folder4 and paste these three files. What I mean by the root: the first level of the lithium folder, namely what you’ll see when you first open the folder, not going deeper.
Please note: If you paste these three folders at the root of your lithium folder, Mac will ask you whether you want to merge or replace files because the root already has folders/files with the same name. Replacing is better.
However, you should be aware that this will eradicate all the content in your original folder. If you have important files in the original folders, you should never click Replace. In fact, if you have important data in your original folder, you’d better generate a new site folder using hugo new site ... command, rather than working in the current folder.
After this is done, open the config.toml. Change baseurl = "/" to baseurl = "https://yourdomain.com/". Save the changes by pressing Ctrl+S on your keyboard.
Then copy and past the following code, and press the Enter key5:
hugo server -D
You should be able to see the following:
Web Server is available at http://localhost:1313/ (bind address 127.0.0.1)
Press Ctrl+C to stop
If so, click http://localhost:1313/, you should be able to see this simple website in your browser.
If everything is going well, we will change the site for a little bit.
Before we make changes, go to Terminal, and then press Ctrl+C to stop the Web Server.
Customizing the theme a little bit
Go to the config.toml file in the root of lithium folder, You can find these:
[[menu.main]]
    name = "About"
    url = "/about/"
[[menu.main]]
    name = "GitHub"
    url = "https://github.com/rstudio/blogdown"
[[menu.main]]
    name = "Twitter"
    url = "https://twitter.com/rstudio"
Please change codes above to the following contents:
[[menu.main]]
    name = "About"
    url = "/about/"
[[menu.main]]
    name = "Post"
    url = "/post/"
This is to delete the GitHub and Twitter section and add a Post section.
Now, please have a closer look at the lithium folder. You can find the content folder. This is the folder where all the contents, mainly posts, will be created and stored. Right now, you can see a file called about.md and a folder called post.
Now, open a text editer. I like using Sublime Text but you can use any other editors you like. Create a new file, and type the following codes into the new file:
---
title: 'Blog'
date: ''
---
Name the file as _index.md, save it, and put it into the folder of post we just talked about.
Okay, now please copy and past the following code again:
hugo server -D
Now, you should be able to see two sections: About and Post. For the purpose of a very simple website, it is enough. Now, what you may want to change is the home page since when you go to this site, what you see is the post section rather home page itself. This is because we don’t have a _index.md file in the root of content folder.
Now, we’ll create a homepage by editing this _index.md we just created.
Copy and paste the codes here into this _index.md.
Refresh your borwser, you should be able to see the changes. However, the posts are still in the home page. How should be remove them?
We have to change list.html file. Open it this way: Themes -> hugo-lithium -> layouts -> _default -> list.html. Open this file using a text editor like Sublime Text rather than the browser.
Replace the contents in that file with these codes:
{{ partial "header.html" . }}

<main class="content" role="main">

  {{ if and .IsHome .Content }}
  <article class="article">
    <div class="article-content">
      {{ .Content }}
    </div>
  </article>
  {{ else }}
  <div class="archive">
    {{ range (where .Site.RegularPages "Type" "post").GroupByDate "2006" }}
    <h2 class="archive-title">{{ .Key }}</h2>
    {{ range .Pages }}
    <article class="archive-item">
      <a href="{{ .RelPermalink }}" class="archive-item-link">{{ .Title }}</a>
      <span class="archive-item-date">
        {{ .Date.Format "2006/01/02" }}
      </span>
    </article>
    {{ end }}
    {{ end }}
  </div>
  {{ end }}

</main>

{{ partial "footer.html" . }}
This solution came from Daijaing Li’s personal website. His website is a great example of how to utilize the Lithium theme. Feel free to git clone his website.
Save the changes and then refresh the browser, now the posts in the homepage should be gone.
Now, we have the homepage, About, and Post section. This should be enough for a simple website.
Please note that this post is not intended to be an extensive guide to website building with Hugo. If you want much more personal touch on websites than what I have covered above, you need more knowledge and Hugo structure, CSS, and HTML.
If you want to make a lot of changes, or that you want to use a fancier, and more complex theme, I highly recommend you to read Yihui Xie’s book: blogdown: Creating Websites with R Markdown. Although this book is about how to build website using the R pacakge of blogdown, you’ll get a deeper understanding about Hugo by reading this book.
In this book, you’ll want to read in more detail the section of 2.5 Templates, and 2.6 Custom layouts.
As I said, a deeper knowledge of Hugo, CSS, and HTML is beyond the scope of this simple tutorial.
Now, I assume that you have your local website ready (you are satisfied with what you see in the browser now).
Go to Terminal, press Ctrl+C to kill the web server. We’ll learn how to put this site online.
GitHub
First of all, you need to create a GitHub account. When this is done, click “new repository”:
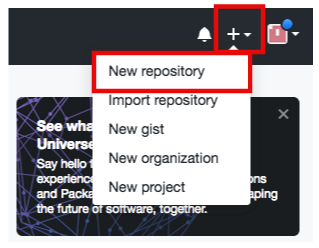
Create a new GitHub Repo
Then do the following:
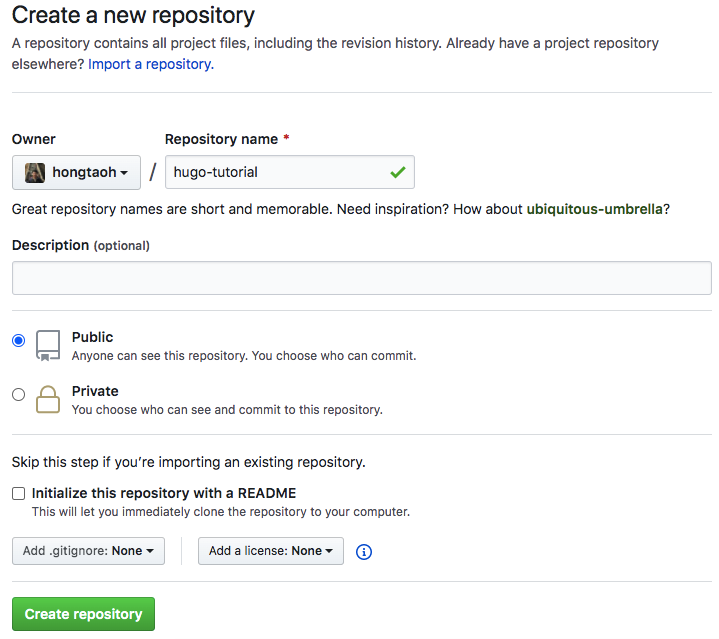
You can use any name you want. Choose “public” rather than “private”. Then click “Create repository”.
You’ll see this:

Later, you’ll need to copy the url by clicking the button on the right.
Now, if you have followed the tutorial, in your Termail, you are still in the directory of lithium. Just to be sure, please type the following code in Terminal to check the current directory:
pwd
If it shows the current working directory is lithium, then you can move on with the following. If not, please google by yourself how to navigate to a specific folder. I won’t go in detail here.
Then copy and paste the following codes:
echo "# hugo tutorial website" >> README.md
git init
rm -rf public
hugo
git add README.md
git add .
git commit -m "first commit"
# For below, please change the url to your own.
git remote add origin https://github.com/hongtaoh/hugo-tutorial.git
git push -u origin master
Refresh your GitHub page, you should be able to see the changes.
Netlify
Now, we need to set up a Netlify account.
Open the website of Netlify. If you don’t have a Netlify accout yet, you need to Sign Up.
Choose GitHub:
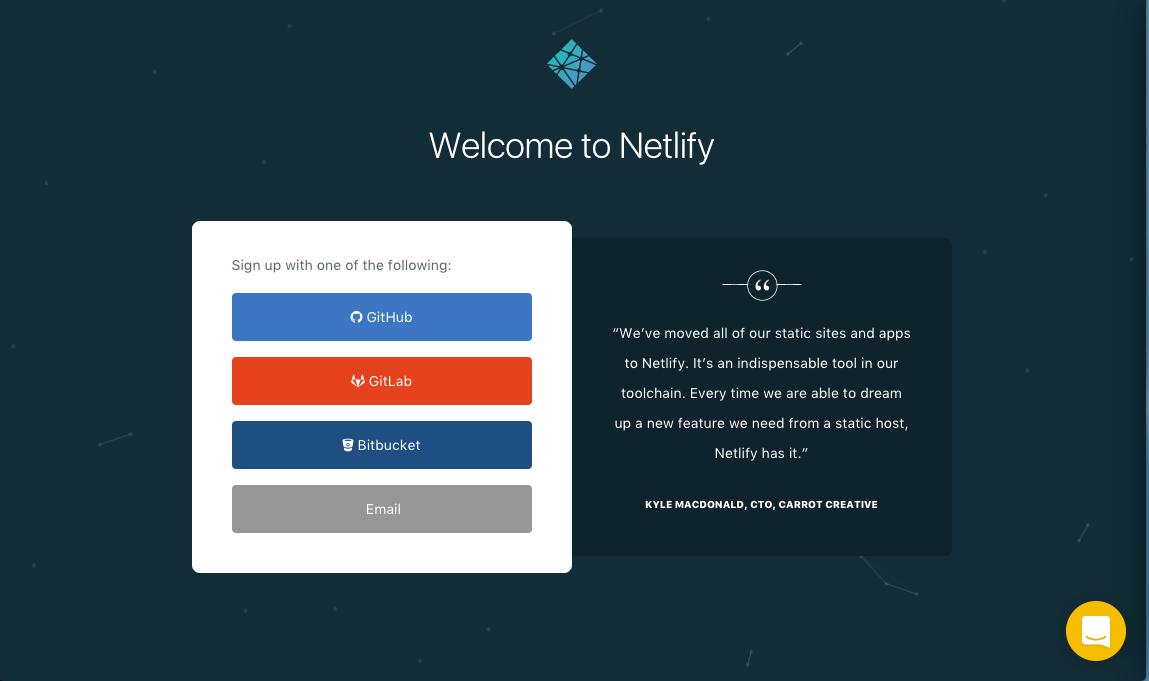
Source:Hugo
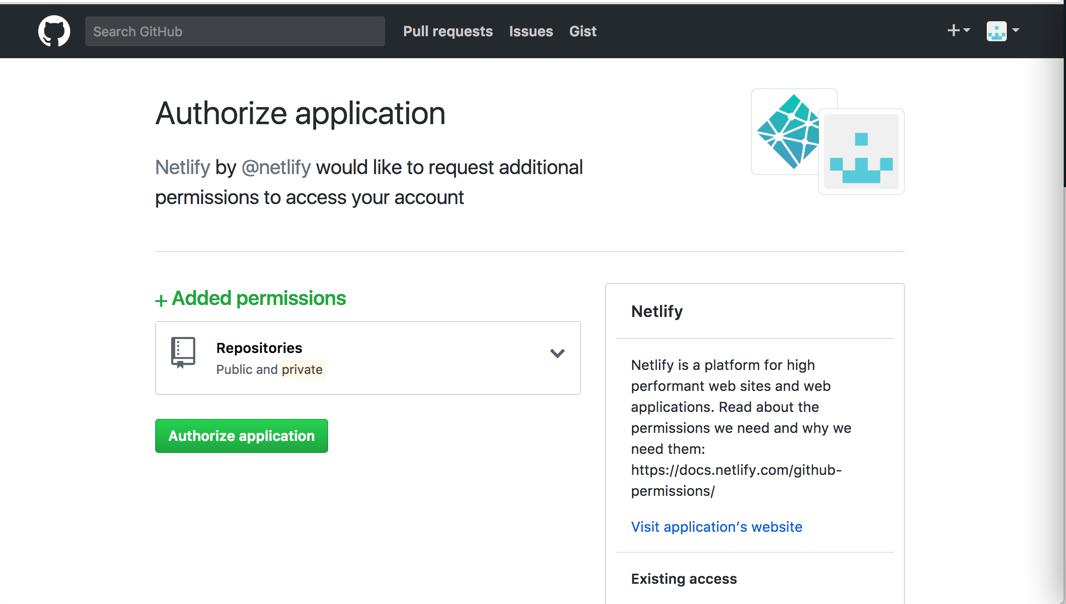
Click “Authorize application”:
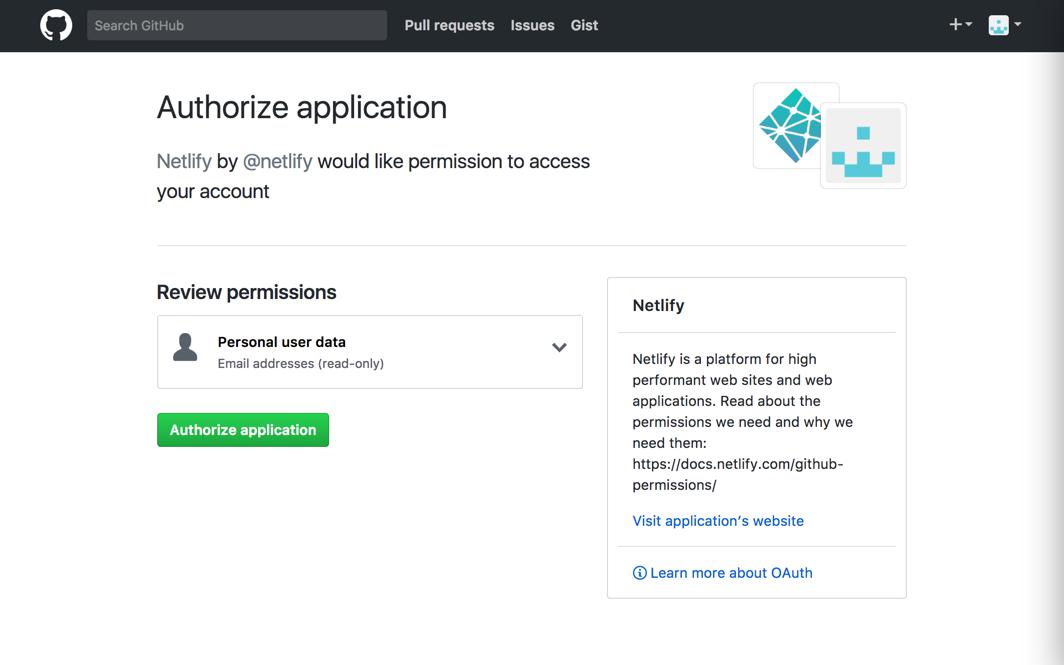
Source:Hugo
Click “New site from Git”:
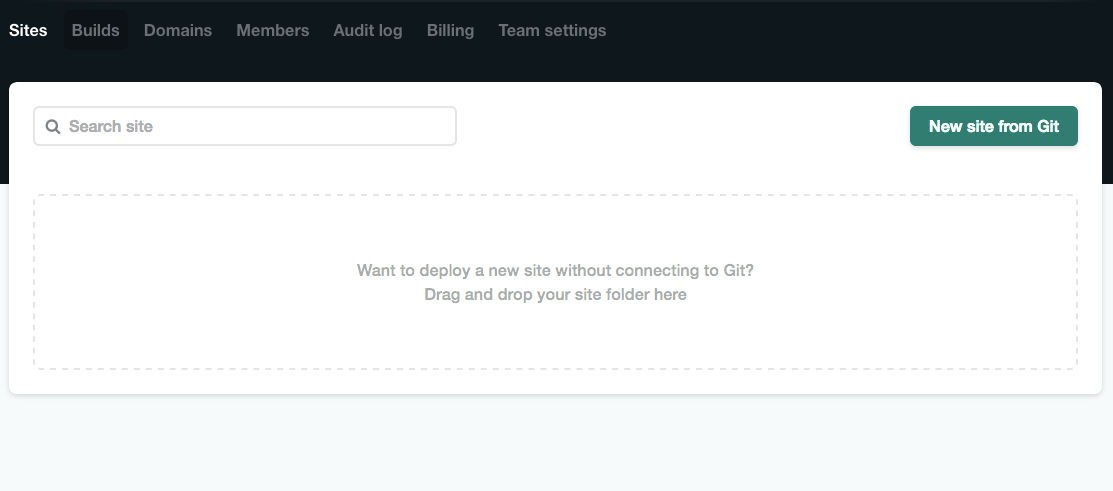
Authorize application again (if you are using Netlify for the first time):
Source:Hugo
NOTE: In the above, the 1st, 2nd, and 4th picture were from Host of Netlify.
Choose Github:
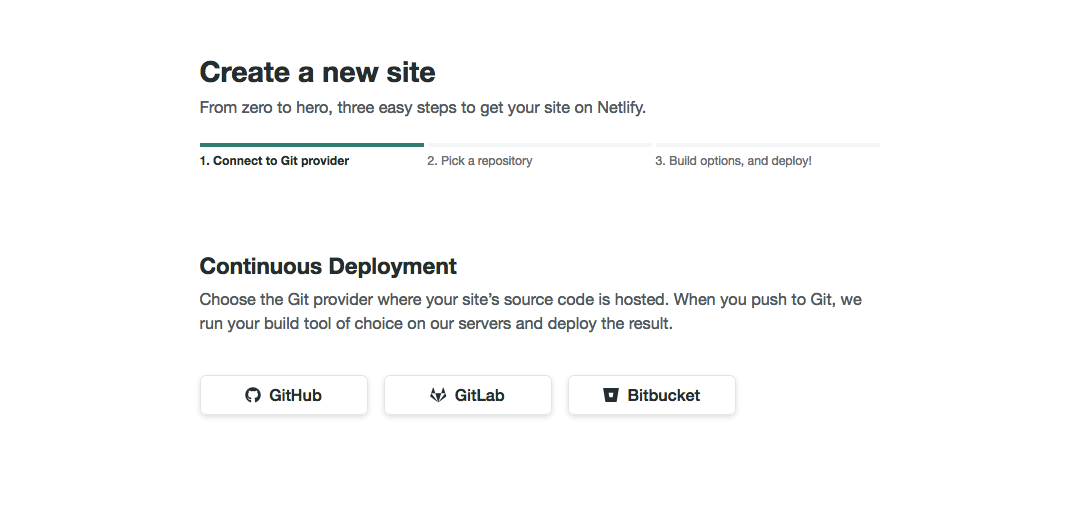
Deployment source should be Github
Then choose the GitHub repository you just created.
Set the Deploy this way:
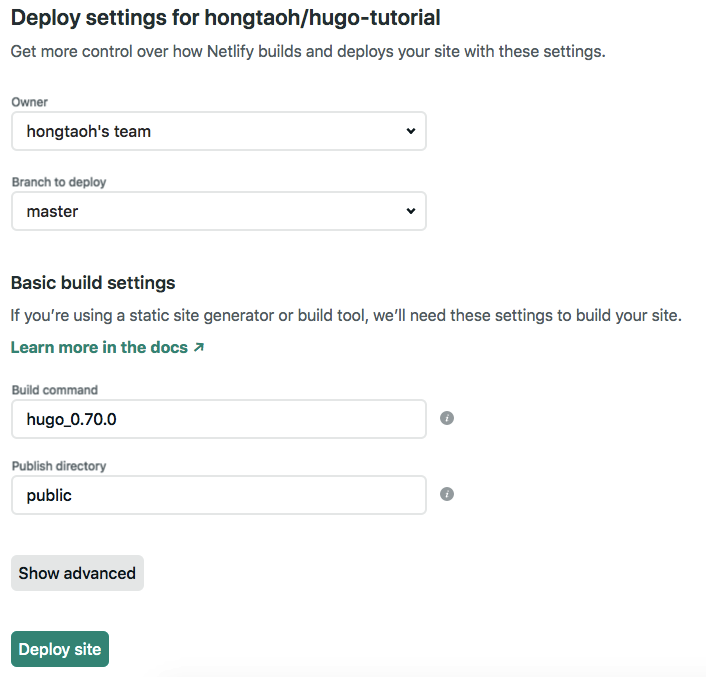
Be sure to use your own Hugo version here. Before we click “Deploy site”, we still need add a file into our lithium folder, as suggested in the tutorial of Host of Netlify by Hugo.
Open a text editor, copy and paste the following codes:
[build]
publish = "public"
command = "hugo --gc --minify"

[context.production.environment]
HUGO_VERSION = "0.70.0" #Change it to your own Hugo version
HUGO_ENV = "production"
HUGO_ENABLEGITINFO = "true"

[context.split1]
command = "hugo --gc --minify --enableGitInfo"

[context.split1.environment]
HUGO_VERSION = "0.70.0" #Change it to your own Hugo version
HUGO_ENV = "production"

[context.deploy-preview]
command = "hugo --gc --minify --buildFuture -b $DEPLOY_PRIME_URL"

[context.deploy-preview.environment]
HUGO_VERSION = "0.70.0" #Change it to your own Hugo version

[context.branch-deploy]
command = "hugo --gc --minify -b $DEPLOY_PRIME_URL"

[context.branch-deploy.environment]
HUGO_VERSION = "0.70.0" #Change it to your own Hugo version

[context.next.environment]
HUGO_ENABLEGITINFO = "true"
Save the file, name it as netlify.toml and put it to the root of lithium folder. Then copy and paste the following codes in your Terminal:
git add .
git commit -m "uploading netlify.toml"
git push
Refresh your GitHub page, you should be able to see the newly added netlify.toml.
Then go back to Netlify, click “Deploy site”. Wait for a while, you should be able to see the website.
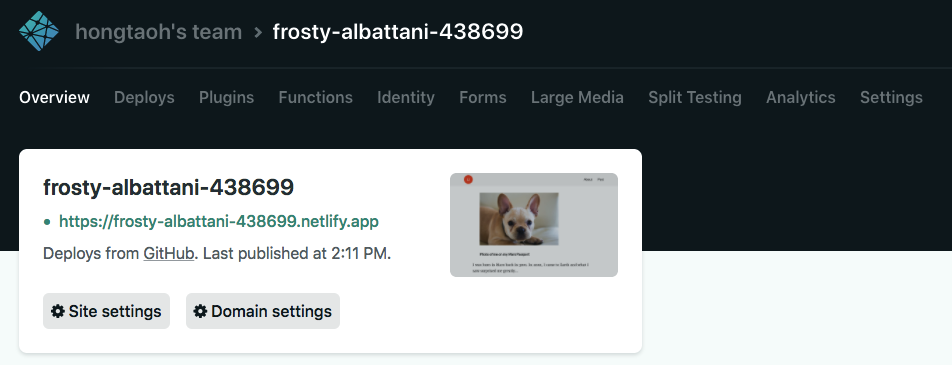
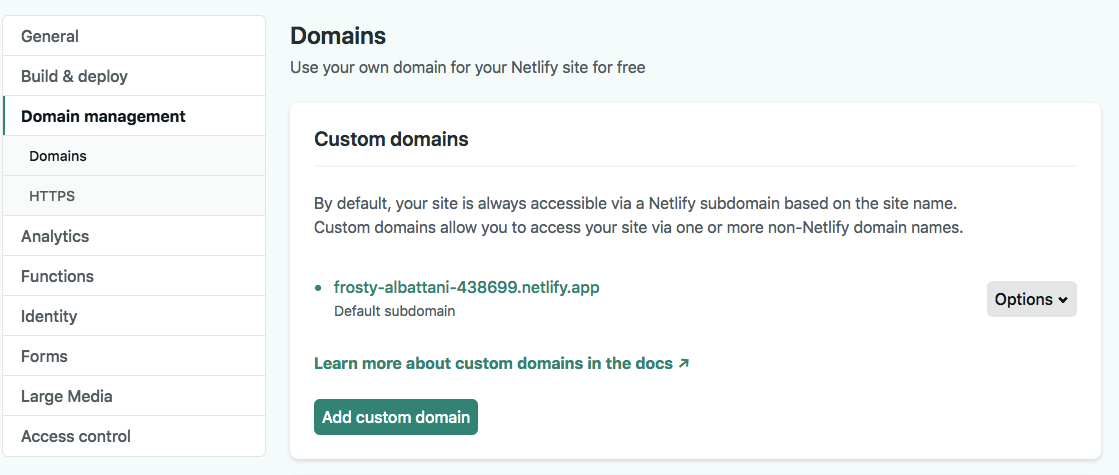
The url seems very ugly. Lest change it. Click “Domain settings” (as is shown above). Click on “Options”, and then “Edit site name”:
Then you can input a name you like, as long as it is still available:
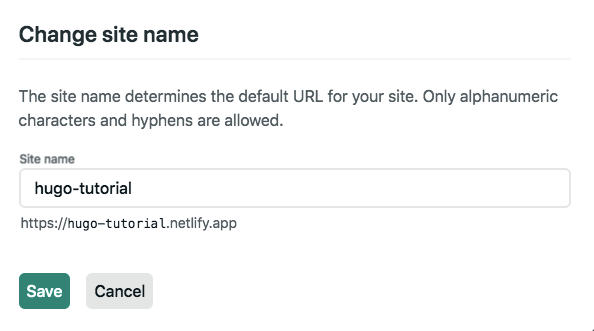
Then the website url is changed to https://hugo-tutorial.netlify.app/.
More Knowledge about Hugo
How to add a new post
Using codes like this:
hugo new post/2020-06-05-another-markdown.md
Keep Deploying
Every time you update you contents, you need to upload them. You’ll need to copy and paste the following codes in Terminal every time:
rm -rf public # delete the public folder
hugo # rebuild the website
git add . # prepare uploads
git commit -m "your message this time"
git push
However, if you update your website often, doing this every time you want to upload new contents can be tedious. Is there a better way? Of course.
Save the following script as deploy.sh and put this script at the root directory of your lithium folder.
rm -rf public
hugo
git add .
msg="rebuilding site $(date)"
git commit -m "$msg"
git push
Every time you want to upload new content, you can run bash deploy.sh at the root directory of your lithium folder. This will automate deployment. Wait for around 20 seconds, you’ll be able to see the changes in your website. Yes, Hugo+GitHub+Netlify is this fast!
Final Repo
If you encounter problems in the above steps, don’t feel discouraged. You can check out the final lithium file here: https://github.com/hongtaoh/hugo-tutorial.
Of course you can git clone this repository. However, be sure to use git remote remove origin before you use git init, which was discussed at the end of the section about Github in this post.
What’s Next
As I said, this post is not intended to be a comprehensive guide to creating a complicated website using Hugo. To do that, you are expected to spend some, if not a lot of, time on studying Hugo, CSS, and HTML. If you have a lot of personal preferences, do expect a lot of frustrucation, especially if you are a programming newbie like me.
Again, I recommend you to read the blogdown book in detail if you want more custimization in your website building.
I spent at least 150 hours on creating my own website using Hugo, for your reference. ↩︎
You only need to press the Enter key once, after you have pasted all the three lines of codees. ↩︎
If you have used a different name than lithium, you should go to that folder on your Desktop. ↩︎
When you type code by yourself, you should press the Enter key at the end of every line, since you can only type one line at time. When you copy and paste lines into
Terminal, you should press Enter key at the end of the last line of code. I won’t repeat “press the Enter key” in the following section, but you should bear in mind that you need to press it by yourself. ↩︎